An infographic needs to be done in two phases and it requires at least three types of creative professionals:
A Writer
The writer will create the copy for your infographic. The copy has to be created and edited for typos before the designer can start working. If you do not have a person on your internal team who can edit the copy, a freelance editor can assist you with this. Ask ClearVoice for additional information on hiring a freelance editor, if you’d like.
An Editor
Your editor will review your infographic copy for typos and grammatical errors. It is extremely important that your copy is flawless before you send it to a designer. It is not a designer’s responsibility to edit your copy. Any typos or misspellings will likely transfer to the design.
A Designer
The designer will use your direction and your brand guidelines to create a beautiful infographic that displays your infographic copy in an interesting way. Overall, the designer’s main goal is to enhance the information given in the infographic copy you provide them.
Phase 1: Create a ClearVoice assignment for your writer.
Step 1: Create a new campaign in your ClearVoice account specifically for infographics.
Fill out all the information in the campaign that you feel your writer needs to know in order to create the exact copy you’d like in the voice and tone that your brand and the subject matter requires.
(Already have your infographic copy written, edited and ready to go? After following the instructions above, skip ahead to Phase 2.)
In the campaign, you must include:
- Language to use/never to use (e.g. use “loved one,” never “addict”).
- A list of your competitors.
- Details on the creative persona you’d like the writer and designer to keep in mind while working.
- The tone you’d like the writer to write in.
- The font(s) in which the copy should be written (if you have very strict brand guidelines).
- The CSS color names you’d like the designer to use (if you have very strict brand guidelines.)
- An example of an infographic you would like your designer to emulate in your new infographic.
Step 2: Create an assignment for the infographic copy. This will be sent to the writer.
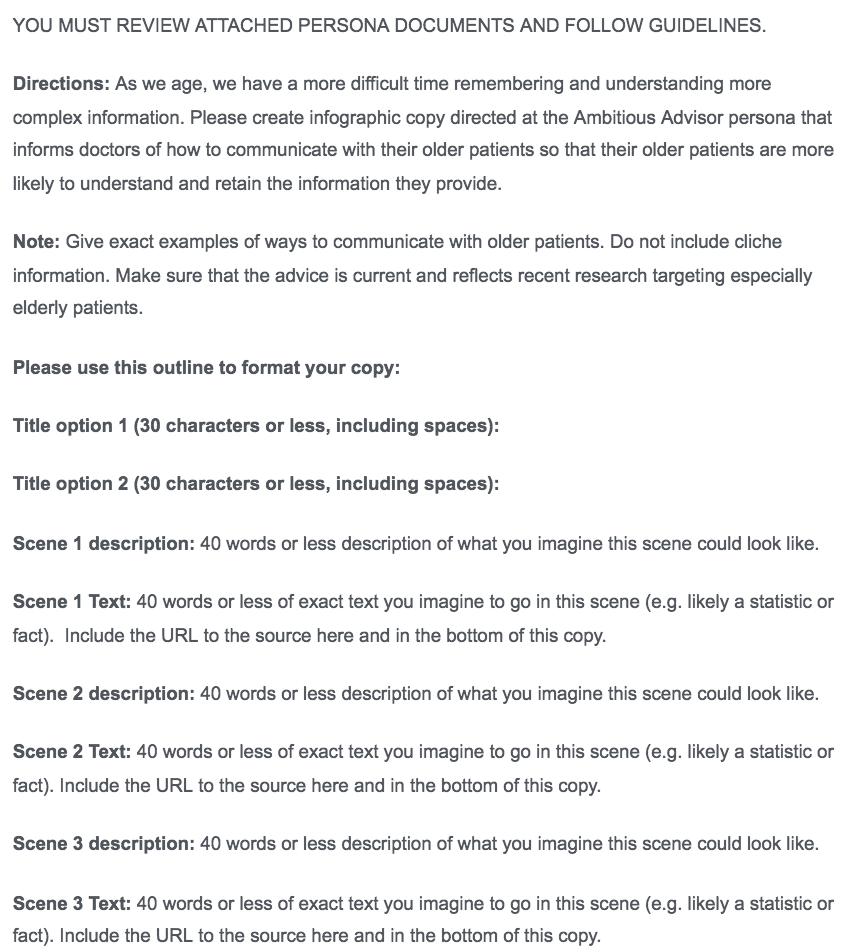
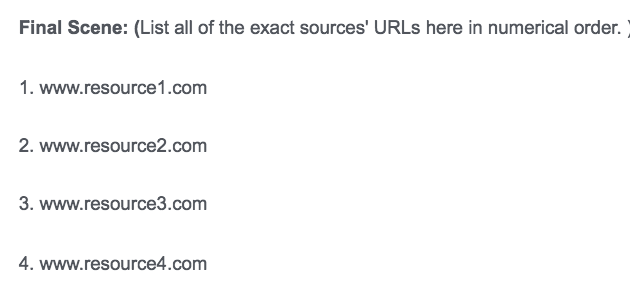
Here's an example of a well-written infographic copy assignment. The average infographic has between 6-8 scenes. See below:
Step 3: Send out the assignment to either an internal writer who is already in your ClearVoice account OR send out the assignment as a talent match opportunity.
Make it very clear in the title of the opportunity that you are looking for Infographic copy. This is important because infographic copy is its own genre of writing. It is very succinct (usually around 300 words for the entire infographic), but is very heavy on the research side as well as the ideation behind what the infographic should look like (the writer provides the ideation for the theme of the infographic and the graphic designer uses that as inspiration).
Step 4: Pay the writer and edit the infographic copy that the writer has submitted to you. If you are in need of an editor, contact ClearVoice for pricing information on a tried-and-true editor.
Phase 2: Send your perfected copy to a designer via an assignment in the Infographic Campaign you created earlier.
Step 1: Add Instructions for the copy (where it should lie, how you'd like it to look, etc.)
Step 2: Next, copy and paste your perfected copy into the assignment as well. Be sure to include instructions stating that the designer is to upload their graphic as an attachment to the assignment before submission.
Step 3: Send the assignment to a designer. The average infographic takes about a week for a designer to complete.
Step 4: Once submitted, review the infographic and convey any requested changes using ClearVoice’s chat feature.
Note: Be sure to take your time in putting your edits together before sending them to the designer. In general, up to two revisions are considered the industry standard. More revisions than that and the designer can start charging for revisions by the hour.
Step 5: Click Approve. You’re done!
Please feel free to reach out in the chat below should you have any questions regarding this process. Best of luck with the Infographic!