How to Create an Assignment
What information do I need to include when creating an assignment?
Creating an Assignment
Creating assignments for writers in ClearVoice is one of the most common tasks, and central to content creation. We will start with how to create an assignment, then get into detail on what to include so your writer can create a great piece!
There are 4 ways to get to start the process of creating an assignment in ClearVoice. No matter which of the below methods you pick, you will be able to fill in all necessary information to dispatch the assignment.
The 4 ways to create an assignment are:
- The New Assignment button on the Dashboard
- The Assignments View page using the Create New Assignment button
- From the Quick Add menu in the bottom left of ClearVoice
- From the Editorial Calendar in ClearVoice
Below is the process to use each of these methods to create an assignment
New Assignment button on the Dashboard
- Click on the New Assignment button, just below the assignment overview. It looks like this:

Create New Assignment button on Assignments View
- Select Manage > Assignments from the left side menu
- In the top right corner of that view, select Create New Assignment
Using the Quick Add menu
- Click the
 button in the bottom left of your screen while logged into the ClearVoice platform
 - Select Assignment
From the Editorial Calendar
- While viewing the Calendar, click on a day
- You will see a form popup to Create a New Assignment
- Select the Customer the assignment will be for (only if managing multiple brands)
- Type in the Assignment Name
- Select a Campaign for the assignment (if applicable)
- Change the due date (the due date will default to the day you selected from the calendar)
- You then can either:
- Click Create Assignment to save as a draft and fill in remaining information later to dispatch
- Click Edit all Details to fill in the remaining assignment information immediately
Completing the Assignment to Dispatch
When you get to filling out the assignment form, required fields are marked with a red *. The key fields to consider are:
1. Who will create the content? (select a team member, a saved user from the Talent Directory, or use the “Send to Talent Network” option)
2. Content Type This will let the writer know what kind of content you're looking for

3. Minimum Word Count how many words you want the article to bee

4. Price (not required for assignments dispatched to internal team members)

5. Due Date (must be seven days out if you’re using a freelancer from the ClearVoice Talent Network)

6. Publication Date (date you plan to publish this piece of content

7. Assignment Name (working title or naming convention you use)

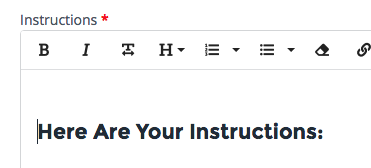
8. Instructions (provide as much detail as possible for the writer)

Your instructions should be the top things that the writer needs to follow on the provided assignment.
Advanced Fields
In addition to the above fields, there are advanced fields which can improve your content creation process.
- Publication date - Provide a target publication date so you’ll get notifications and can use your editorial calendar for planning.
- Campaign - Use campaigns for organizing content. Read more here.
- Byline- indicate whether or not the writer's byline will be utilized on the final publication
- Strategist, Editor- Set the Strategist and Editor of assignments so they get notifications and can manage their workload. Read about user roles here.
- Final Approver- If you use a final approver on assignments for your account, set them here.
- Target Keywords - Add keywords for assignments. Keywords will save and repopulate if you need to reuse them.
- Publication - Set up publications so content can be pushed to your Wordpress (as a draft).
- Tones - Choose up to five tones to help define content voice.
- Personas - If you have personas created, select whichever one is most relevant for the article.
- Editorial Guidelines - Enter rules for the writer to follow. These can be editorial or style guidelines, and they can be tied to specific campaigns. Learn more about tying writer guidelines to campaigns.
- Reference materials - Upload relevant files or post URLs with attached notes for direction.
Reviewing Assignment Details
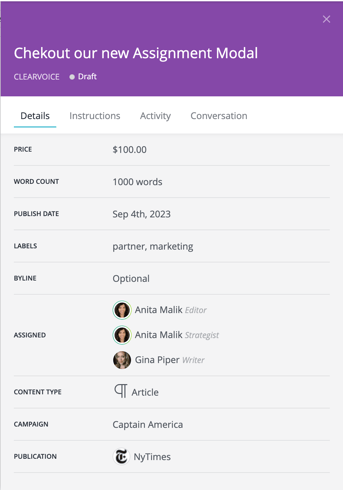
We have added an Assignment Modal in the Assignment Details to help review and confirm assignment guidelines prior to Saving them.
When viewing assignments that have the statuses of Draft, Offered and Casting, you will see a side modal on the right of the page. Click the arrow on the right of the page if the modal is collapsed to expand the Assignment Modal.

At the top of the modal, you will see the title of the assignment, the customer account the assignment is listed for, and the status of the assignment.
Within the modal, you will have tabs with the following information
- Details - view general information about the assignment and the people involved here
- Instructions - view the full instructions and editorial guidelines here, as well as any associated reference materials
- Brand Profile- view the full Brand Profile for the customer you are working with
- Activity - see the full history of the assignment here from dispatch, through publication with dates.
- Conversation - find the full messaging thread for the assignment here, and add any followers that need to be looped in on the assignment chat
You can close the modal by clicking the X in the top right corner.
Any changes that you'd like to make to the assignment information you see in the modal, can be updated in the assignment form in the middle of the page. Once you are satisfied with your changes, click Save to confirm them. Refresh the page to see the updates displayed in the assignment modal.
Once the required fields are filled out, click Offer to [Writer Name] and your assignment will be dispatched to the Talent Network or a writer on your team.
Best of luck with your assignment! Let us know if you have any questions and feel free to reach out via the Chat at the bottom of this page or to support@clearvoice.com